MedEDocs Pedal Configuration
The MedEDocs Transcription Software supports the VEC Infinity (IN-USB) USB
foot control and most game port foot controls. There are 9 different game
port foot control configuration settings to accommodate most game port
pedals (15 pin). If you do not have a pedal we recommend our part
number IN-USB
or IN-USB2 for around $64.95. See our site for current pricing
USB Pedal
For USB pedals simply plug the pedal into your
computer and let Windows find and install the
new hardware.
Proper configuration of the
software is necessary for proper operation.
Configuration information can be entered
or edited from the expanded login/configuration
screen available from the configuration menu.
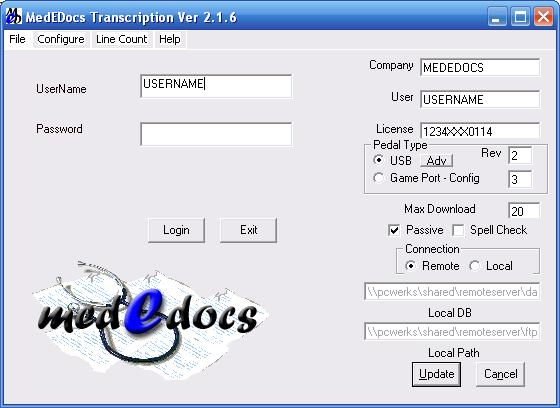
Under Pedal Type
select “USB.” To configure your pedal so that
rewind is on the left and fast forward is on the
right, put either a 1 or 3 in the “Config” box. To
configure your pedal so that rewind is on the
right and fast forward is on the left, put a 2
or 4 in the “Config” box. If you change the
configuration number, you will need to click
"update" to save the changes then exit the
transcription software and open it again to
activate the change.
Enter the Company Code,
User Name, and License
Number provided.
Rev is the number of seconds of
rewind (review) provided when the foot pedal
control is lifted.
Max Download is the maximum
number of reports that will be assigned at any
time. This number is user determined within the
maximum set by the administrator.
Passive mode allows the
software to operate behind most hardware or
software firewalls. There is normally no need to
change this setting.
Remote/Local When set to
remote, the software interacts with the MedEDocs
central database via the Internet. When set to
Local the software interacts with a local
machine or local network accessible Microsoft
Access database.
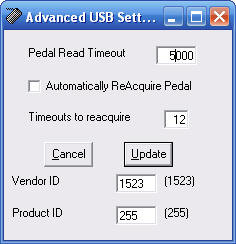
Advanced Pedal Configuration:
Click the ADV button next to "USB" in the pedal section of the
configuration screen. In the top box of the advanced settings window,
if your pedal is sluggish change the value from 400 (default) to 500 (or up to 800) click update then click update on the configuration
screen.
Game Port Pedal
First, attach the pedal to the joystick/game port of the
computer. You will need to make sure that is enabled. To enable the pedal
and to identify the configuration for your pedal click Start - Settings -
Control Panel - Game Controllers. This will bring up the joystick
configuration screen.
NOTE: If you are using the radio shack game port to USB adapter 26-164 to
connect your game port pedal to a USB port, see instructions under USB
Adapter.
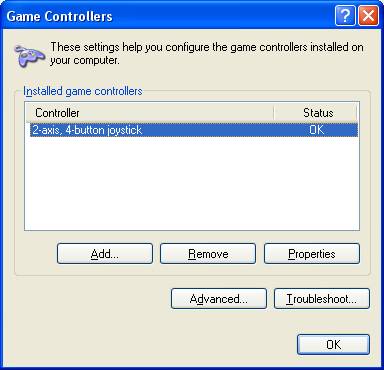
Make sure that your pedal is identified as a 2 axis - 4 button
joystick. If windows did not automatically identify the controller use
the ADD button to add a 2 axis - 4 button joystick
Next you will click on the properties button to display the Game
controller properties screen. then select the "Test" tab
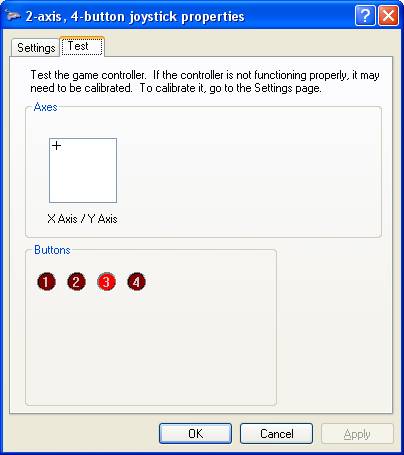
Press the pedals one at a time from left to right and note the number
of the light that corresponds. Use the table below to identify the pedal
code:
Button sequence Code used
1,2,3................1
1,3,2................2
3,1,2................3
2,1,3................4
2,3,1................5
3,2,1................1
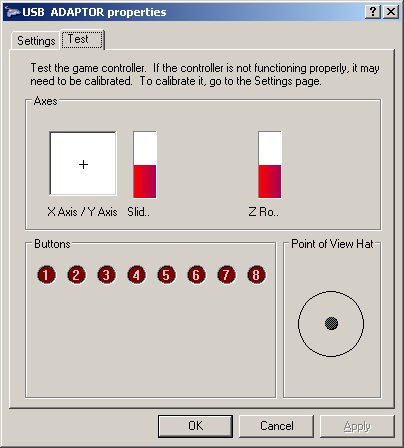
USB ADAPTERS: If you are using the Radio Shack game port to USB adapter
#26-164 or other game port to USB adapter, you will not need to add a 2
axis - 4 button joystick. The adapter will be recognized automatically
as a USB adapter or "Human interface device" (see figure below). Though
the device may show 8 buttons, the pedal will only activate the first 3.
Use the table above to chose the correct pedal type configuration number
to enter into the configuration screen.